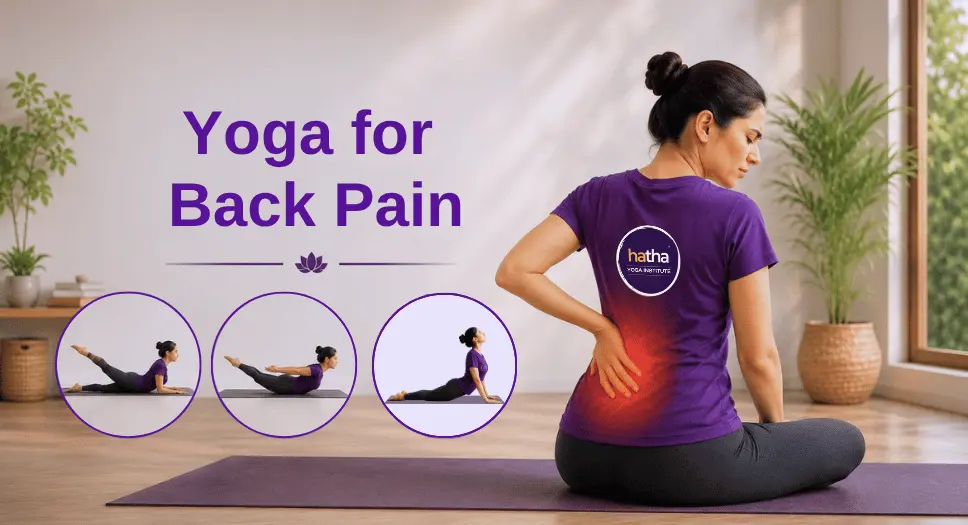
Let me be honest with you. Back pain is exhausting. Not just physically, but mentally. That constant awareness of your own body, the way you hesitate before standing up, the little wince you try to hide when you reach for something on a low shelf. If that sounds familiar, you are in very good company. Millions of people around the world are dealing with the exact same thing every single day.
Here is the frustrating part: there are so many supposed solutions out there, pills, gadgets, fancy chairs, and yet the one approach that consistently delivers real, lasting results tends to get overlooked. That approach is yoga for back pain.
I know what you might be thinking. Yoga seems too gentle, too slow, maybe even too spiritual to tackle something as stubborn as chronic back pain. But stick with me here, because the science behind it is genuinely compelling. This guide walks you through everything: how yoga for back pain relief actually works, which poses to practice, how to do them safely, and what kind of timeline you can realistically expect.
First, Let's Talk About Your Back
Before jumping into poses, it helps to understand what kind of back pain you are dealing with. Because “back pain” is one of those umbrella terms that can mean very different things depending on where the pain lives.
The neck and upper spine (cervical region) is where many desk workers feel discomfort. Hours of looking at screens, holding tension in your shoulders, sleeping in awkward positions; it all adds up.
The middle back (thoracic region) is less talked about but just as troublesome. This part of your spine connects to your rib cage, which limits its movement. Prolonged sitting and rounded shoulders are the usual culprits here.
The lower back (lumbar region) is where most people feel it. This section carries the bulk of your body’s weight, which makes it both hardworking and vulnerable. Most yoga for lower back pain conversations center on this area, and for good reason.
Pain also varies in how long it sticks around. Some people deal with acute pain that flares up suddenly and clears within a few weeks. Others experience sub-acute pain that lingers for one to three months. And then there is chronic pain, anything that continues beyond twelve weeks, which requires a more patient, consistent approach to healing.

The Real Reason Your Back Hurts
Here is something most people do not realize: the majority of back pain is not caused by a single dramatic injury. It builds quietly over time.
When your back muscles are asked to do more than they are capable of, whether from hours of sitting, poor posture, physical labor, or even stress, they get strained. Tendons lose their elasticity. Stiffness accumulates. And without the muscular support it needs, your spine becomes unstable and vulnerable.
In other words, the core problem is often muscular weakness combined with insufficient flexibility. And that is precisely what yoga for back pain is designed to address. Not by numbing symptoms, but by building the strength and mobility your back needs to support itself properly.
Why Yoga Actually Works (The Science Backed Reasons)
This is not just ancient wisdom. There is real physiology behind it.
It builds your core, which protects your spine. Your abdominal and deep spinal muscles act like a natural brace around your lower back. When they are weak, your back muscles compensate, and that is when things start to hurt. The right yoga pose for back pain engages the core directly and reduces that burden.
It lengthens tight muscles that pull on your spine. Tight hamstrings, stiff hip flexors, and tense shoulders do not just cause discomfort in those areas. They actually drag your spine out of alignment. Yoga for lower back tension gently and progressively releases that tightness.
It retrains your posture. Poor posture is one of the sneakiest contributors to back pain because it happens so slowly you do not notice until it is already causing damage. Yoga builds postural awareness and strengthens the muscles that hold you upright, so good alignment starts to feel natural.
It improves circulation in affected tissue. Inflammation is a major component of chronic back pain. The gentle, controlled movements in yoga increase blood flow to those areas, accelerating the body’s natural healing process.
It addresses the mental side of pain. This one surprises people. Stress and anxiety are not just emotional states. They have a physical signature, and that signature often shows up as muscle tension in your back and shoulders. Yoga’s breathing and mindfulness components calm your nervous system, which directly allows your muscles to release.
What You Gain From a Regular Practice
When you practice consistently, even just a few times a week, the benefits compound in ways that genuinely change daily life:
- Pain begins to ease within the first couple of weeks
- Movements that used to hurt start feeling more fluid
- Your posture improves without you having to consciously think about it
- Sleep gets better as nighttime discomfort fades
- You rely less on painkillers or anti-inflammatories
- You develop a deeper, more intuitive connection with your body
These are not exaggerated promises. They are what consistently shows up when people actually commit to yoga for back pain relief.
The Poses: Your Complete Guide
Here is where we get practical. These yoga asanas for back pain have been chosen specifically for back health. Each one targets a different piece of the puzzle. Together, they form a complete and balanced routine.
For Lower Back Pain
1. Ardha Shalabhasana: Half Locust Pose
This is where beginners should start. It is gentle enough to practice even when your back is flaring up, but effective enough to make a real difference as part of your yoga for lower back routine.
How to do it:
- Lie face down with your forehead resting on the mat
- Let your arms rest alongside your body, palms turned down
- Press your pubic bone into the mat to protect your lower back
- On an exhale, slowly lift your right leg, keeping it straight
- Your left leg stays on the ground; your core stays engaged
- Hold for five to ten breaths, then lower slowly
- Switch sides, doing five to eight rounds on each
Why it works: It specifically strengthens the erector spinae, the muscles that run along your spine and keep it upright. Weak erector spinae muscles are one of the most common causes of chronic lower back pain.
2. Salabhasana: Full Locust Pose
Once the half version feels manageable, this full variation takes your back strength to another level entirely.
How to do it:
- Lie on your belly, forehead down, arms at your sides
- Press the tops of your feet firmly into the mat
- On an exhale, lift your chest, arms, and both legs simultaneously
- Keep your neck neutral and do not strain to look upward
- Squeeze your glutes and engage your lower back
- Hold for three to five breaths
- Rest briefly and repeat three to five times
Why it works: This activates your entire posterior chain, including glutes, hamstrings, lower and upper back, all in one movement. The result is dramatically improved back stability and strength, making it one of the most effective yoga positions for back pain.
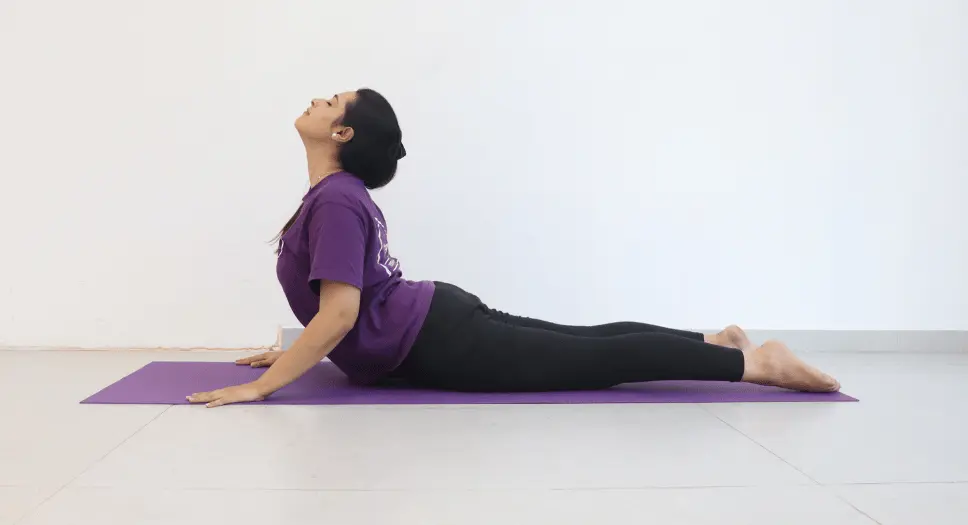
3. Bhujangasana: Cobra Pose
Few poses have helped as many people as Cobra. It is one of those foundational yoga asanas for back pain that earns its place in almost every back care routine.
How to do it:
- Lie on your belly, hands placed under your shoulders
- Fingers point forward and elbows stay close to your body
- Press your thighs and the tops of your feet into the mat
- On an inhale, gently press through your hands to lift your chest
- Your pelvis stays on the mat throughout
- Hold for fifteen to thirty seconds
- Lower on an exhale and repeat five to eight times
Why it works: Cobra simultaneously strengthens your back muscles and opens your chest, which is the opposite of the forward rounded posture that most modern lifestyles create. It is particularly effective for yoga for lower back pain and general spinal health.
4. Ushtrasana: Camel Pose
This one is for those who have built some foundation with the earlier poses. Camel is a deep backbend that opens the entire front of your body while demanding real back strength.
How to do it:
- Kneel with your knees hip width apart
- Rest your hands on your lower back, fingers pointing downward
- Engage your core, then lift your chest forward and upward
- Gently press your hips forward
- If it feels comfortable, reach back one hand at a time to hold your heels
- Keep your neck neutral and do not let your head drop back
- Breathe deeply for twenty to thirty seconds
- Come back up slowly using your hands for support
Why it works: This yoga pose for back pain puts your entire back through a deep strengthening movement while also improving spinal extension, which is the kind of movement most people almost never do in daily life.
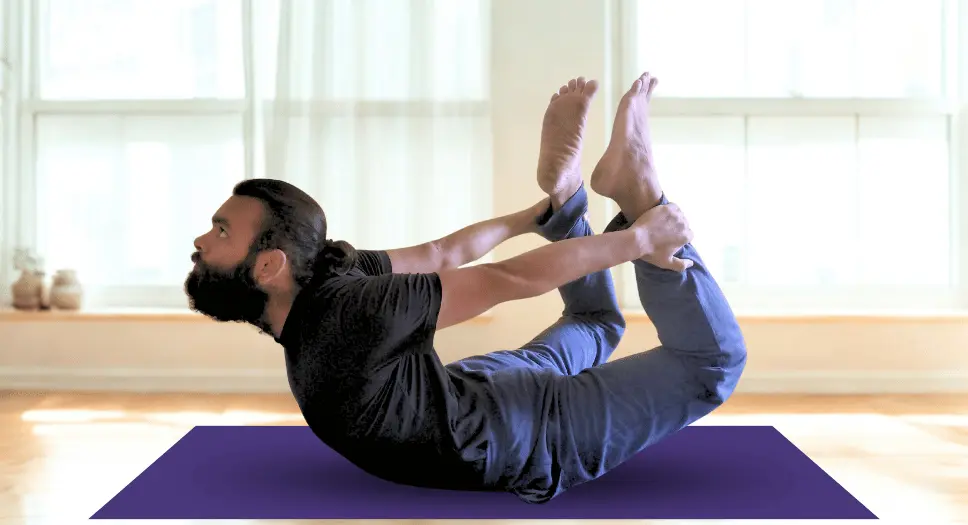
5. Dhanurasana: Bow Pose
Bow Pose is something of a superstar in the world of back care. It combines strengthening and deep stretching in a single held position, making it one of the most rewarding yoga positions for back pain you can practice.
How to do it:
- Lie on your belly, forehead down
- Bend your knees and bring your heels toward your buttocks
- Reach back and grip your ankles firmly
- On an inhale, kick your feet into your hands, which naturally lifts your chest and thighs off the mat
- Keep your knees roughly hip width apart
- Hold for fifteen to thirty seconds, breathing steadily
- Exhale, release, rest for a moment, and repeat three to five times
Why it works: It stretches your hip flexors and quadriceps while strengthening your back and opening your chest and shoulders simultaneously. Very few poses accomplish this much in one shape.
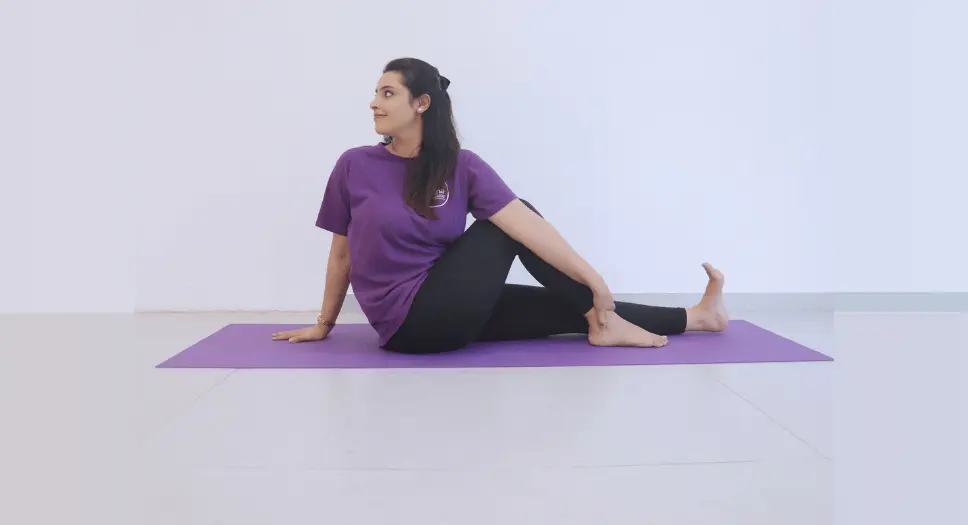
For Spinal Mobility and Flexibility
6. Vakrasana: Twisted Pose
Twisting poses often get underestimated. But for back pain, they are essential. They mobilize the spine in a way that forward bends and backbends simply cannot.
How to do it:
- Sit with both legs extended in front of you
- Bend your right knee and place your right foot just outside your left knee
- Sit tall, inhale, and feel your spine lengthen
- As you exhale, rotate your torso to the right
- Place your left arm gently against the outside of your right knee
- Rest your right hand on the mat behind you for support
- Keep both sitting bones grounded
- Hold for twenty to thirty seconds with steady breathing, then switch sides
Why it works: Spinal rotation releases tension in the lower back, mobilizes the vertebrae, and can offer significant yoga for back pain relief for people with stiffness from prolonged sitting.
7. Ardha Matsyendrasana: Half Lord of the Fishes Pose
A step deeper than Vakrasana, this twist provides more intense rotation and is especially helpful for sciatic discomfort. It is a cornerstone yoga asana for back pain that experienced practitioners return to again and again.
How to do it:
- Start seated with both legs extended
- Bend your right knee, placing the right foot outside the left knee
- Inhale and reach your left arm upward
- As you exhale, fold forward gently and wrap your left arm around your right knee
- Keep your spine as long as possible and fold from the hips, not the lower back
- Hold for thirty to forty five seconds, breathing steadily
- Release and repeat on the other side
Why it works: This pose deeply targets the glutes and hip rotators, which are muscles that when tight become a leading cause of sciatic pain and lower back tension.
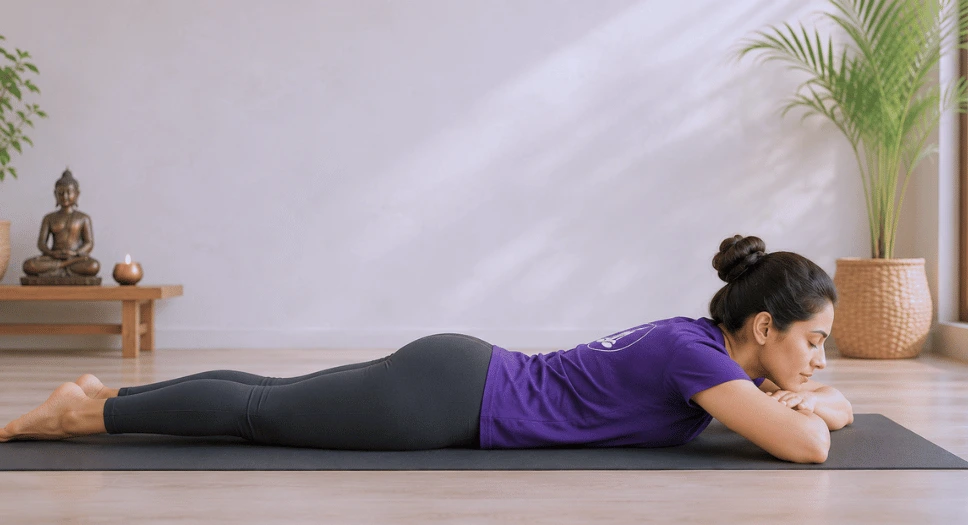
For Gentle Relief and Lower Back Support
8. Makarasana: Crocodile Pose
On the days when your back is particularly unhappy, this is the yoga pose for back pain you want. It asks almost nothing of you while still providing genuine relief.
How to do it:
- Lie on your belly with your forearms flat on the mat, elbows under your shoulders
- Let your lower body completely relax with no effort required
- Breathe slowly and deeply, letting gravity do the gentle work of stretching your lower back
- Stay for one to two full minutes
- Nothing should be forced here; this is pure rest
Why it works: It is accessible to anyone regardless of flexibility or pain level, and the passive stretch it provides to the lower back can bring meaningful relief during acute pain phases.
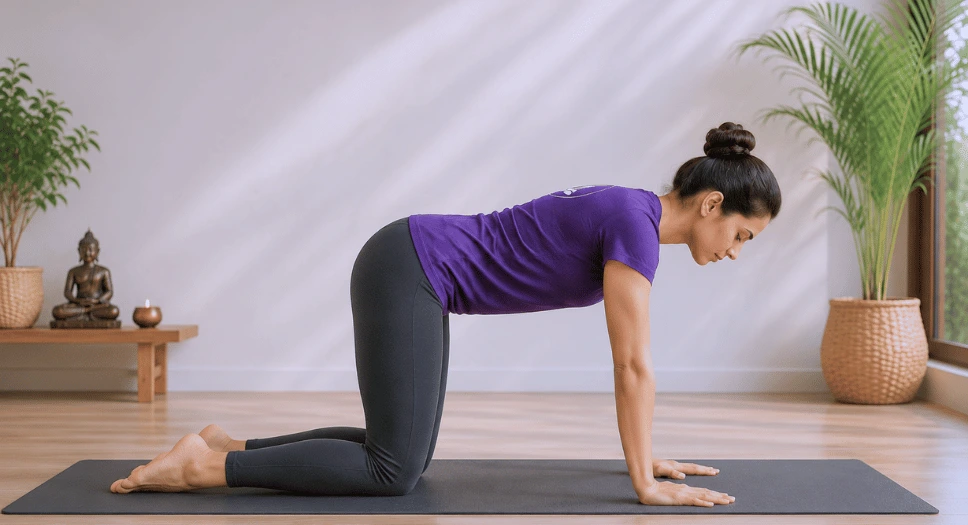
For Upper Back and Shoulder Health
9. Marjari Asana: Cat Cow Pose
If there is one place to begin every yoga for lower back practice, it is here. Cat Cow warms up the spine from top to bottom, vertebra by vertebra.
How to do it:
- Come to hands and knees, wrists under shoulders, knees under hips
- Cow: Inhale and let your belly drop, lift your gaze, open your chest
- Cat: Exhale and round your spine upward, tuck your chin, draw your belly in
- Flow between these two with your breath for eight to ten rounds
- Move slowly and fluidly; this is not a race
Why it works: This movement is uniquely effective at creating mobility through the entire spine. It prevents the kind of deep stiffness that builds up during periods of inactivity or prolonged sitting.
10. Kandharasana: Shoulder Pose
Also known as the preparatory shoulder stand, this pose directly targets the upper back and shoulder stabilizers.
How to do it:
- Lie on your back with knees bent and feet flat on the mat
- Press your feet down and lift your hips as high as feels comfortable
- Interlace your fingers underneath your back and press your shoulders into the mat
- The weight should be on your shoulders, not on your neck
- Hold for twenty to thirty seconds, breathing steadily
- Lower slowly and rest
Why it works: Rounded shoulders are one of the most common postural problems today, and they place serious strain on the upper back and neck. This pose directly counteracts that pattern.
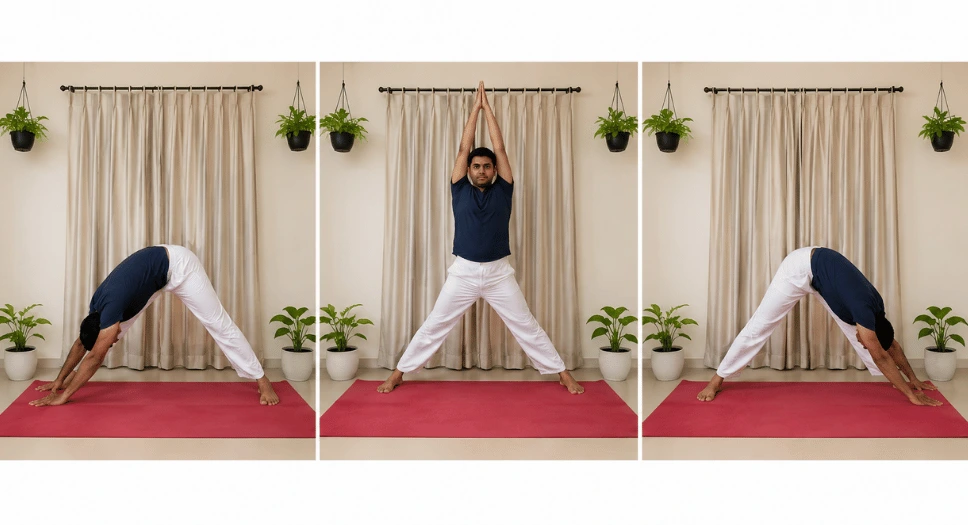
For Overall Back Strength and Endurance
11. Sarvanga Pushti: All Limbs Strengthening Pose
This one builds the kind of endurance your back muscles need to handle real daily life, not just lying on a mat.
How to do it:
- Stand with feet hip width apart
- Exhale and fold forward, placing your hands on the mat
- Step or jump your feet back into a plank position
- Hold your body in one straight line from head to heels
- Keep your core firmly engaged for twenty to thirty seconds
- Step or jump your feet back toward your hands
- Roll up slowly to standing
- Repeat three to five times
Why it works: It builds full body endurance with particular emphasis on core and back strength, which is the foundation of a back that can handle daily demands without breaking down.
12. Hrid Gati: Heart Opener Flow
This flowing sequence ties everything together, building strength in the back while opening the chest and creating full body integration. It is one of the most dynamic yoga asanas for back pain in this entire routine.
How to do it:
- Begin standing in Mountain Pose
- Inhale and raise both arms overhead
- Exhale and fold forward, hands to the mat
- Inhale, step or jump back to a plank
- Lower into Cobra Pose on an exhale
- Inhale, press back into Downward Facing Dog
- Hold for three to five breaths
- Walk or hop your feet toward your hands
- Inhale as you roll up to standing
- Repeat five to eight times
Why it works: The continuous movement builds back strength dynamically while the chest opening components counterbalance the forward rounded posture that drives so much back discomfort.
Restorative Finish
13. Shavasana with Visualization: Corpse Pose
Never skip this. It is not just a rest. It is where a lot of the actual healing happens.
How to do it:
- Lie flat on your back, legs extended, arms resting at your sides
- Close your eyes and let everything go
- Visualize warm, healing energy flowing gently to wherever your back holds tension
- Picture it as a soft golden warmth spreading through that area
- Stay for five to ten minutes, simply breathing and resting
- When you are ready, gently roll to one side before sitting up
Why it works: Your nervous system needs time to shift out of stress mode for muscles to truly let go. This pose creates the conditions for deep relaxation and tissue recovery that the more active poses simply cannot provide on their own.
Practicing Safely: What You Need to Know
Even the most therapeutic practice can cause problems if done carelessly. Here is how to protect yourself.
Before you start, talk to your doctor if you are dealing with severe or chronic pain. And if you practice with a teacher, let them know about any injuries or limitations upfront. Start with the gentler poses and build from there.
During practice, never push through sharp or worsening pain. Yoga should feel like productive effort, not punishment. Keep breathing consistently because holding your breath is a sign you are overdoing it. Always keep your core gently engaged to protect your lower back, and prioritize correct alignment over depth. A modified pose done well beats an advanced pose done recklessly.
After practice, transition slowly from the floor to standing. Drink water. Give your back a couple of hours before any heavy lifting. Pay attention and note whether your pain levels, flexibility, or energy are shifting over time. That feedback tells you a lot.
Supporting Your Practice Off the Mat
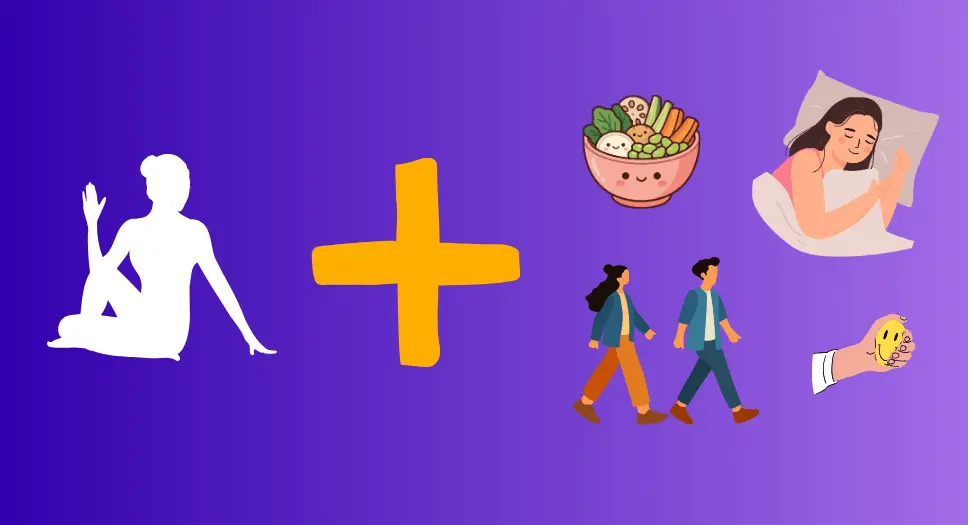
Yoga for back pain works best when it is part of a broader lifestyle that supports your back. A few things that make a real difference:
- Food matters more than people expect. Anti inflammatory foods like turmeric, ginger, and leafy greens genuinely support healing. Sugar and processed foods do the opposite. This does not require perfection, but some awareness helps.
- Your sleeping surface matters too. A supportive mattress makes a meaningful difference for back health. A surface that sags in the middle works against everything you are building on the mat.
- Hot and cold therapy applied several times daily, alternating heat and cold packs, can accelerate recovery during acute flare ups.
- Movement between sessions is just as important as the yoga itself. Get up every thirty minutes when you are sitting. Take short walks. Stretch your hip flexors when you can. Your back does not recover from hours of immobility no matter how well you practice.
- Stress management deserves a mention here too. Mental and emotional tension translates directly into physical muscle tension, particularly in the back, neck, and shoulders. Even five minutes of slow, deep breathing during the day can make a noticeable difference.
A Realistic Daily Routine (25 to 35 Minutes)
You do not need hours to see results. Here is a practical daily structure for your yoga for back pain practice:
Warm Up (3 to 5 minutes)
- Cat Cow: 10 flowing rounds
Strengthening (8 to 10 minutes)
- Half Locust: 5 rounds each side
- Full Locust: 3 to 5 rounds
- All Limbs Strengthening Pose: 3 to 5 rounds
Stretching and Mobility (7 to 10 minutes)
- Cobra Pose: 5 to 8 rounds
- Twisted Pose: 30 seconds each side
- Half Lord of the Fishes: 30 to 45 seconds each side
Restorative Close (5 to 10 minutes)
- Crocodile Pose: 1 to 2 minutes
- Shavasana with visualization: 5 to 10 minutes
If daily practice feels like too much to start, four or five sessions a week is a perfectly solid foundation. As your body adapts, you can increase the frequency naturally.
Honest Expectations: What Changes and When
Weeks 1 to 2: You will likely notice relief during and immediately after each session. Circulation improves and tight muscles start to respond.
Weeks 3 to 4: Pain levels start dropping more consistently. Flexibility begins to improve in areas that used to feel locked.
Weeks 5 to 8: The changes become more noticeable throughout your day, not just during practice. Posture improves, strength increases, and pain episodes become less frequent and less intense.
Beyond 8 weeks: For most people, chronic pain has reduced substantially or resolved entirely. More importantly, you have developed new physical habits and a much stronger foundation for long term spinal health.
Your timeline might be faster or slower depending on your history, age, and consistency. What matters most is simply showing up regularly.
When to See a Doctor Instead
Yoga for back pain relief is powerful but it has limits, and knowing those limits is part of practicing wisely. Seek professional medical attention if you experience:
- Pain that shoots down your leg, particularly below the knee
- Numbness or tingling in your legs or feet
- Any loss of bowel or bladder control
- Unexplained weight loss alongside back pain
- Fever that accompanies your back pain
- Pain that followed a significant fall or accident
- Pain that consistently worsens despite rest and gentle movement
These are signals that something beyond muscular strain may be happening, and a doctor or physical therapist needs to be part of the picture.
Take Your Healing Further With Hatha Yoga Institute
If the poses in this guide have started making a difference for you, it may be worth exploring Hatha Yoga Institute as a more structured and complete path forward.
Hatha Yoga Institute is the traditional foundation from which most modern yoga styles grow. Unlike faster paced practices, Hatha focuses on holding postures with intention, synchronizing breath with movement, and building a deep awareness of how your body feels from the inside out. For people dealing with back pain specifically, this slower and more deliberate approach is often exactly what the body needs.