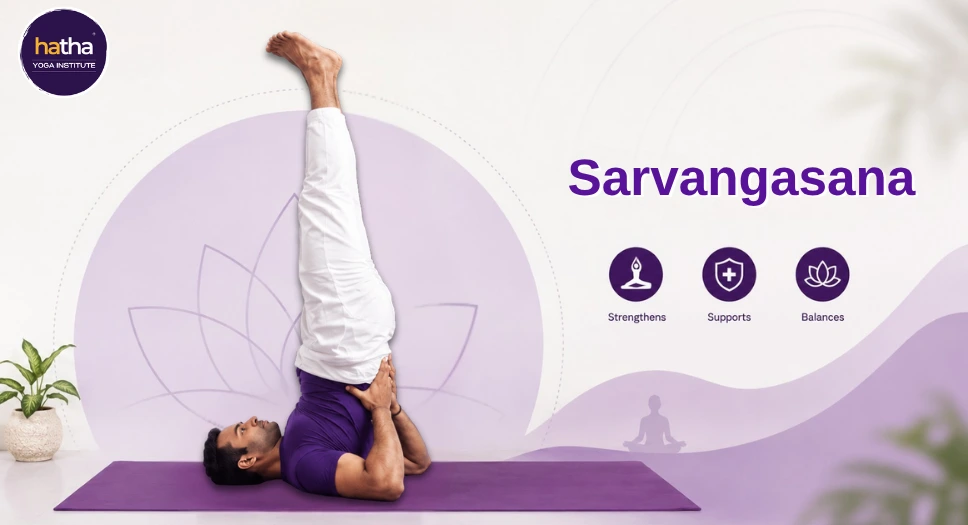
Yoga, a practice followed for centuries to achieve strength of the body and mind along with inner peace and harmony, consists of numerous postures. One such posture which plays an important role in a complete yoga routine is Sarvangasana. Also known as the “Queen of Asanas” (Sirsasana being “King of Asanas”), the inverted posture is highly valued for the numerous positive impacts it creates on the glandular, circulatory, and nervous systems of the body. This guide will walk you through everything you need to know, from proper alignment to the benefits of doing Sarvangasana and the precautions you must keep in mind.
This blog explores exactly why the timing is right, what a diploma in yoga actually involves, how it differs from short certification programs, and why choosing the right institute matters just as much as choosing the right course.
What is Sarvangasana?
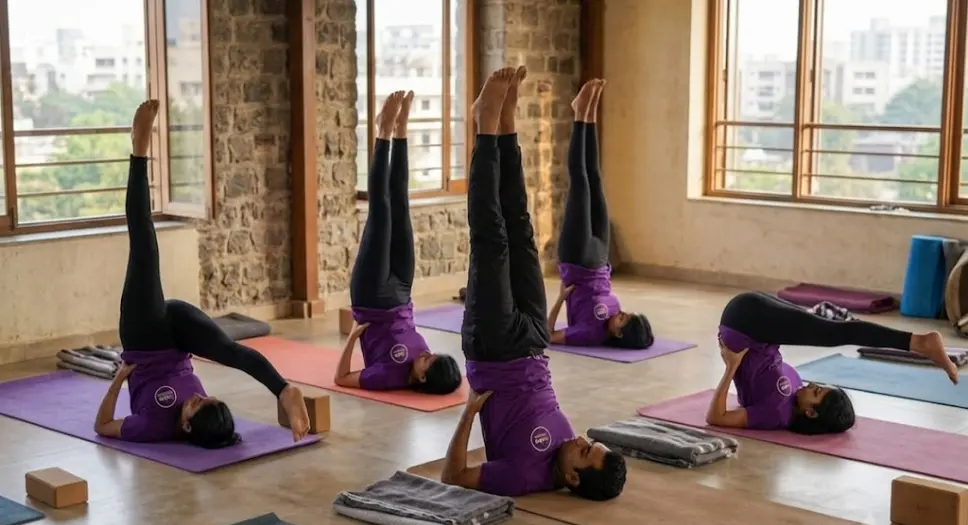
The name Sarvangasana is derived from the Sanskrit language, where “sarva” means “all” or “entire,” and “anga” means “limb” or “body part.” Adding “asana” means “pose”; hence, its translation becomes “the pose that helps all the body parts.” The name is not an exaggeration in any way. The other popular name for Sarvangasana is the Shoulder Stand pose. Sarvangasana is the inversion pose in which the body weight is kept on the shoulder while the legs and spine stand straight upward in the air.
It differs from Sirsasana (the Headstand) in the sense that the weight of the body is placed on the head and neck in the latter but in the former, it is placed on the shoulders and upper arms, making it less risky compared to the latter pose if it is practiced correctly. Sarvangasana is a part of the Hatha Yoga tradition and it is usually taught at the end of an asana practice, which is then followed by some counter pose like Matsyasana (Fish Pose) or Halasana (Plow Pose).
As it is an inverted pose, it makes sure that the direction of the blood flow reverses and it goes towards the brain, heart, and thyroid glands.
Understanding the Basics Before You Begin
Before diving into the technique, it helps to understand the general principles behind this posture. Sarvangasana is not simply about lifting the legs into the air; it requires:
- A strong foundation through the shoulders, upper arms, and elbows
- Core engagement to lift and stabilize the lower body
- A steady, controlled breath throughout the pose
- Mindful awareness of the neck, which should remain relaxed and unstrained
Practitioners who approach this pose with patience and proper preparation tend to experience the greatest advantage of Sarvangasana, both physically and mentally. Rushing into the full expression of the pose without adequate strength or flexibility can lead to discomfort or injury, so a gradual, informed approach is always recommended.
Step-by-Step Guide: How to Do Sarvangasana
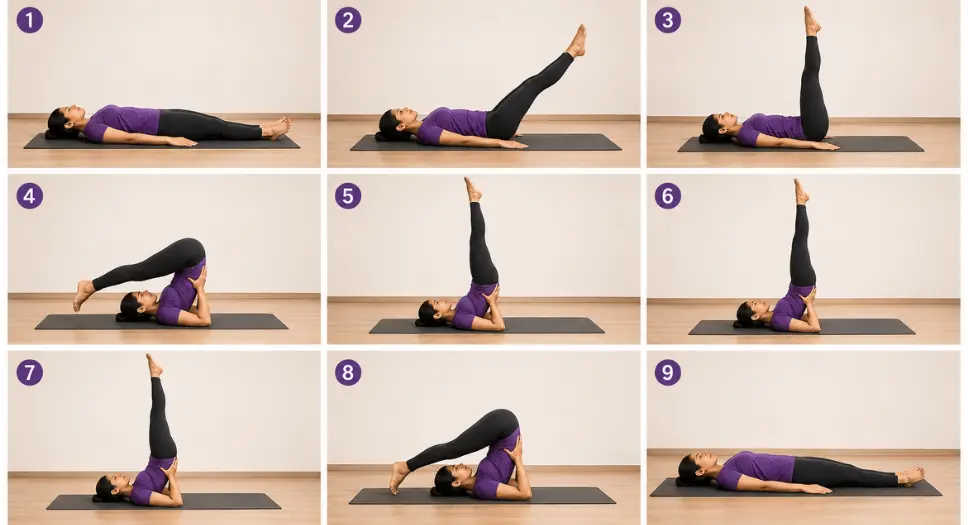
Below is a detailed, step-by-step breakdown to help you practice this pose safely and effectively.
Step 1: Prepare Your Space and Body
Choose a quiet, clutter-free area with a yoga mat or folded blanket for cushioning. A folded blanket under the shoulders (with the head resting on the floor, not the blanket) can help protect the delicate cervical spine. Wear comfortable clothing that allows free movement, and practice on an empty stomach, ideally in the morning or at least four to six hours after a meal.
Step 2: Lie Down in Preparation
Lie flat on your back in Savasana (Corpse Pose), with your arms resting alongside your body, palms facing down. Take a few deep breaths here to settle your mind and prepare your body for the inversion.
Step 3: Lift Your Legs
- Press your palms into the floor for support.
- Engage your abdominal muscles and slowly lift both legs together to a 90-degree angle.
- Keep your legs straight and your movements controlled, avoiding any jerking motion.
Step 4: Lift Your Hips and Lower Back
- Using your hands and core strength, push your hips and lower back off the floor.
- Bring your knees toward your forehead as your hips lift.
- Support your lower back with your palms, elbows firmly planted on the ground close to your body.
Step 5: Extend the Spine and Legs Upward
- Slowly straighten your spine and legs, extending them vertically toward the ceiling.
- Your body weight should now rest on your shoulders, upper arms, and elbows, not on your neck or head.
- Keep your elbows shoulder-width apart to maintain stability.
Step 6: Align the Body
- Ensure your chin is gently tucked toward your chest, creating a slight chin lock known as Jalandhara Bandha.
- Keep your legs, hips, and shoulders in one straight vertical line.
- Engage your core and thigh muscles to maintain balance without wobbling.
Step 7: Hold and Breathe
- Once stable, close your eyes and focus on slow, steady breathing through the nose.
- Beginners can hold the pose for 15 to 30 seconds, gradually increasing the duration to one to three minutes with regular practice.
- Avoid holding your breath; instead, let each inhale and exhale be smooth and even.
Step 8: Release the Pose
- To come out of Sarvangasana, slowly bend your knees toward your forehead.
- Use your hands to support your lower back as you gently roll your spine back down to the floor, one vertebra at a time.
- Lower your legs slowly, keeping them straight, and avoid dropping them abruptly.
Step 9: Rest and Counter Pose
- After releasing the pose, rest in Savasana for at least 30 seconds to allow your heart rate and breathing to normalize.
- Follow up with a gentle backbend such as Matsyasana to counterbalance the forward compression of the neck during Sarvangasana.
Practicing these steps mindfully, rather than forcing the body into the full pose immediately, is key to building strength and confidence over time.
Benefits of Doing Sarvangasana
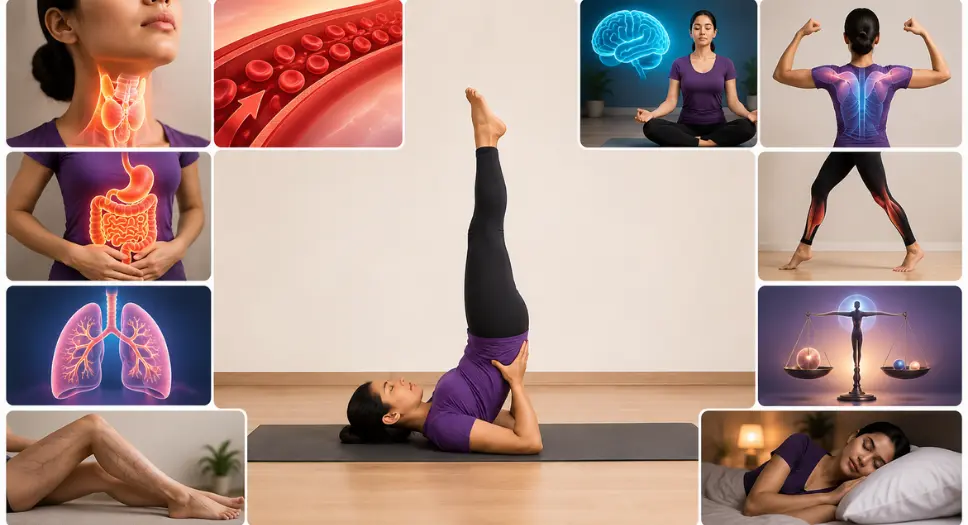
The benefits of doing Sarvangasana extend across nearly every system in the body, which is why it has earned its reputation as one of the most comprehensive yoga postures. Here are some of the most notable benefits:
- Supports thyroid and parathyroid health: The chin lock created during the pose gently compresses the throat region, stimulating the thyroid and parathyroid glands, which play a crucial role in regulating metabolism.
- Improves blood circulation: Inverting the body allows venous blood from the legs and pelvis to flow back toward the heart more efficiently, which can help reduce feelings of heaviness in the lower limbs.
- Calms the nervous system: The pose has a soothing effect on the mind, often reducing symptoms of stress, mild anxiety, and mental fatigue.
- Strengthens the upper body: Regular practice builds strength in the shoulders, arms, and upper back, which support the body’s weight throughout the pose.
- Enhances digestion: The gentle compression of the abdominal region can stimulate digestive organs, potentially easing issues like constipation over time.
- Tones the legs and core: Holding the inverted position engages the core, hips, and leg muscles, contributing to overall toning and stability.
- Improves respiratory function: Deep, controlled breathing during the pose can enhance lung capacity and encourage more mindful breathing patterns.
- Balances hormones: By supporting endocrine gland function, Sarvangasana may contribute to more balanced hormonal activity throughout the body.
- Reduces varicose vein discomfort: The inversion can relieve pressure on the veins of the legs, offering temporary relief for those prone to varicose veins.
- Promotes better sleep: Many practitioners report improved sleep quality when this pose is included in a regular evening or pre-bedtime routine.
Advantage of Sarvangasana Beyond the Physical
While the physical benefits are well documented, the advantage of Sarvangasana also reaches into the mental and emotional dimensions of well-being.
- Mental clarity and focus: The increased blood flow to the brain can enhance concentration and mental sharpness.
- Emotional balance: Regular inversion practice is often associated with a greater sense of calm and emotional steadiness.
- Improved self-awareness: Balancing in an inverted position requires deep body awareness, which can translate into greater mindfulness in daily life.
- Confidence building: Successfully holding an inversion, even for a short time, can boost self-confidence and a sense of accomplishment.
- Better stress management: The combination of physical exertion and controlled breathing helps activate the parasympathetic nervous system, supporting the body’s natural relaxation response.
These combined physical and mental effects are precisely why so many yoga traditions, including classical Hatha Yoga, place such strong emphasis on this posture as part of a balanced practice.
Precautions to Keep in Mind
While Sarvangasana offers numerous benefits, it is an intermediate-to-advanced pose that requires respect for the body’s limitations. Consider the following precautions before attempting the pose:
- Avoid if you have neck or spine injuries: Since the pose places weight on the shoulders and neck region, individuals with cervical spine issues, herniated discs, or recent neck injuries should avoid it or practice only under expert supervision.
- Not recommended during menstruation: Many traditional yoga schools advise against practicing inversions during menstruation, as the reversal of natural downward energy flow may not be suitable during this time.
- Avoid with high blood pressure or heart conditions: Since inversions affect blood flow and pressure distribution, those with hypertension, heart disease, or a history of stroke should consult a doctor before practicing.
- Skip if pregnant: Pregnant individuals, especially in the second and third trimesters, should avoid this pose unless guided by a qualified prenatal yoga instructor.
- Caution with eye conditions: People with glaucoma, retinal detachment, or other eye pressure-related conditions should avoid inversions due to increased pressure in the head and eyes.
- Not for beginners without guidance: Those new to yoga should first build strength in preparatory poses and ideally learn Sarvangasana under the guidance of a certified instructor to ensure correct alignment.
- Avoid on a full stomach: Practicing right after eating can cause discomfort, nausea, or digestive strain due to the inverted, compressed position of the abdomen.
- Use proper support: A folded blanket under the shoulders (not the head) can help protect the neck and maintain proper spinal alignment.
- Stop if you feel pain or dizziness: Any sharp pain, dizziness, or breathing difficulty is a signal to gently exit the pose and rest.
Respecting these precautions ensures that your practice remains safe, sustainable, and genuinely beneficial over the long term.
Variations of Sarvangasana
As your practice matures, you may explore variations that add depth and challenge to the pose, such as:
- Eka Pada Sarvangasana: One leg extended toward the ceiling while the other lowers toward the floor, enhancing balance and core control.
- Parsvaika Pada Sarvangasana: A side variation where one leg extends to the side, improving hip flexibility.
- Niralamba Sarvangasana: An advanced variation performed without the support of the hands on the back, requiring significant core and shoulder strength.
These variations should only be attempted once the classical form of the pose feels stable and comfortable.
Bringing It All Together
It is not just an inversion but an entire practice that encompasses almost every bodily system as well as the mind. Be it managing thyroid issues to settling the nerves, the benefits offered by this asana explain why such practices have been esteemed so much in traditional yoga practices. This being said, the extent to which it brings about benefits cannot be separated from the significance of performing this asana right, taking care of your present level of strength and flexibility.
Whatever be the aim – be it improved blood flow or hormonal balance or mental well-being – the inclusion of Sarvangasana in one’s daily routine can turn out to be a game changer.
Frequently Asked Questions About Sarvangasana
1. How long should I hold Sarvangasana?
Beginners can start with 15 to 30 seconds and gradually work up to one to three minutes as strength and comfort improve. Advanced practitioners with years of experience sometimes hold the pose for five minutes or longer, but this should never be rushed.
2. What is the best time to practice Sarvangasana?
Early morning, on an empty stomach, is traditionally considered the ideal time. If mornings are not possible, ensure at least four to six hours have passed since your last meal before practicing.
3. Can beginners practice Sarvangasana daily?
While experienced practitioners may practice daily, beginners are generally better served by practicing two to three times a week, allowing the neck, shoulders, and core time to build strength gradually without strain.
4. Is Sarvangasana the same as Halasana?
No. Halasana (Plow Pose) is often practiced alongside Sarvangasana and involves lowering the legs behind the head while the hips remain lifted, whereas Sarvangasana keeps the legs extended straight up. The two poses are frequently sequenced together in a practice.
5. What should I do if my neck hurts during the pose?
Neck discomfort is a clear sign to release the pose immediately. It often indicates that too much weight is resting on the neck rather than the shoulders and upper arms. Using a folded blanket for support and reviewing your alignment with a qualified teacher can help correct this.
Learn Sarvangasana the Right Way with Hatha Yoga Institute
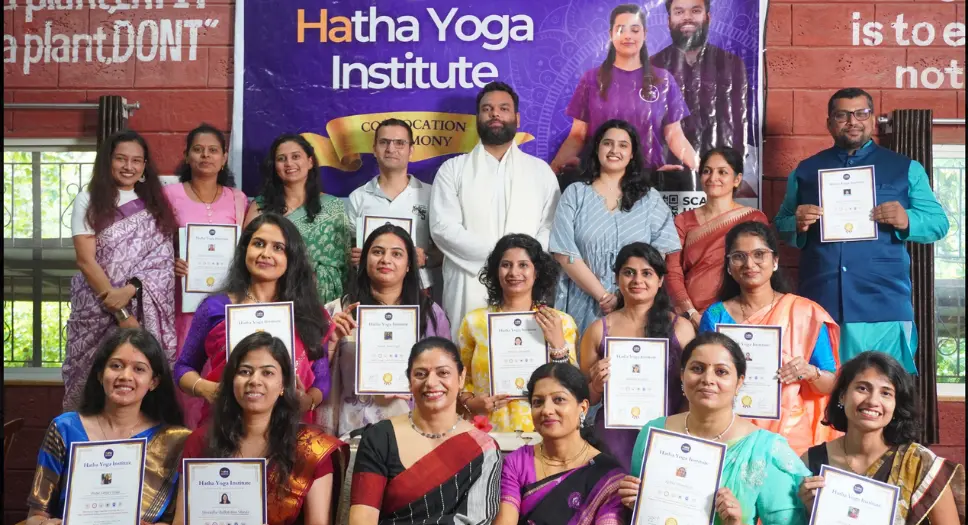
Postures such as Sarvangasana are highly beneficial, but they also require attention to detail when it comes to alignment. If you are interested in learning the postures (such as this one), Hatha Yoga Institute should be your first choice. Offering yoga classes with professional instructors who pay particular attention to alignment, breath, and gradual progress, Hatha Yoga Institute is an appropriate place for all yoga practitioners regardless of their experience level (from beginners to those who perfect advanced postures). In-person classes or online ones are available for students of Hatha Yoga Institute.