Face yoga is a series of targeted facial poses that release tension from over-worked muscles and activate the underworked ones. It’s also combined with proper body posture and conscious breathing.
“Yoga” is just a catchy way to say facial exercises that move the muscles on your face into certain positions kind of like yoga for your body. The aim is to create a moment of self-care where you use face yoga for glowing skin to improve blood circulation and reduce stress and tension in your face.
Most people hold tension in their faces, whether through facial expressions or too much time in front of a screen. All these daily activities cause patterns in how we use our face and the specific muscles we recruit. This is why we want to focus more on releasing and softening our faces to let go of these patterns, making it a highly effective method of face yoga for wrinkles.
Face yoga is a combination of breath work and facial muscle engagement which improves the mental health too.
What are the benefits of Face Yoga?
- It helps to release stress and tension in your face muscles.
- It increases blood circulation in face muscles and maintain hormonal balance in your body
- Improves your mental health.
- It strengthens and tones facial mus-cles.
- 5. It is a powerful form of face yoga for glowing skin that nourishes the complexion.
- Counter the effects of gravity
- It’s the anti-aging, super effective, low cost and reduces dependency on parlours and beauticians.
- It is very relaxing and improves our sleep quality if done at night.
Componests Of Face Yoga
- Exercise (ASANA)
- Mantra
- Breathing Exercise
- Massage
- Accupressure
What are the Skin types?
To get the most out of your face yoga exercises, first identify which of the following skin types you have.
- Dry skin & dull skin (totally dry): Dry skin generally produces fewer natural oils than other types of skin. This may cause it to appear dull and become rough, flaky, or even scaly. It often feels tight or less elastic, noticeably dehydrated, and may be prone to showing more visible fine lines. In Addition, it may become itchy or irritated.
- Oily skin (totally oily): Oily skin produces an excess of sebum that causes the skin to appear shiny and feel greasy-especially through-out the T-zone (forehead, nose, and chin). People with oily skin may tend to have less wrinkles, but they may also be more prone to enlarged pores, acne blemishes, blackheads, and white heads.
- Combination skin (only ‘T’ zone oily and other part is dry): Combination skin includes areas that are dry as well as oily-with the T-zone commonly being oily, and the cheeks being either dry or normal. This skin type can vary during different seasons of the year, and due to various factors, such as stress or hormone fluctuation.
- Normal skin: Normal skin is balanced-feeling neither too dry nor too oily. It is not prone to breakouts, flakiness, or feeling greasy or tight. People with normal skin typically have pores that are small, a smooth skin texture, and are less prone to sensitivity or blemishes.
- Sensitive skin: Sensitive skin is often referred to as a skin type, but it’s possible to have oily sensitive skin, dry sensitive skin, or normal sensitive skin. Regardless of which type of skin you have, if you have sensitive skin, it may appear red and feel like it’s burning, itching, or dry. These symptoms may be related to having skin that is more vulnerable to external irritants and may be triggered by certain ingredients-like dyes or fragrance as well as environmental factors.
- Acne prone skin: If acne breakouts are frequent to you, then you can say you have acne-prone skin. This isn’t your regular pimple outbreak which happens sometimes, but instead is a frequent occurrence that leaves your skin with acne and sometimes even inflamed skin. Acne-prone skin is a long-term, chronic skin condition that requires months and even years of treatments to keep it manageable.
How can I identify my skin type at home?
The “Wait and Watch” method
This at-home test allows you to under-stand your skin type by observing how your skin behaves after cleansing.
- To start, wash your face with a gentle cleanser, then gently pat it dry
- Wait 30 minutes.
- If your skin appears shiny through-out, you likely have oily skin
- If it feels tight and is flaky or scaly, you likely have dry skin.
- If the shine is only in your T-zone, you probably have combination skin.
- If your skin feels hydrated and comfortable, but not oily, you likely have normal skin.
The blotting sheet method
When pressed to the skin, blotting sheets absorb oil-and you can use them to help you understand what type of skin you have.
- After washing your face with a gentle cleanser, pat it dry and wait for 30 minutes.
- Press blotting sheets to various areas of your face, then hold the sheets up to the light to see the oil markings.
- If the sheets soaked up an abun-dance of oil from all areas of the face, you have oily skin.
- If they absorb little to no oil, then you probably have dry skin.
- If the sheets show only a small amount of oil from your T-zone, you have combination skin.
- If you only see minimal oil from every area of your face, you most likely have normal skin.
Lymphatic drainage massage
Forehead
Hold your index finger to the points given below for 10 seconds and then rotate clockwise & anticlockwise
Here are three points – upper, middle and center part of forehead
- For Upper part – Place index finger on upper part of forehead then stretch towards temporal region
- For Middle part – Place index finger on middle part of forehead then stretch and hold. (do it thrice)
- For Centre part – Do the same three times.
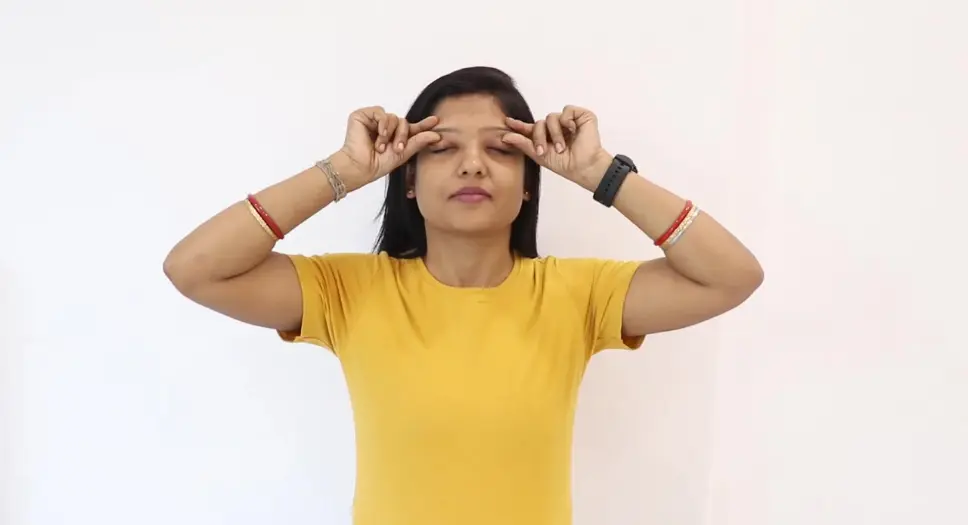
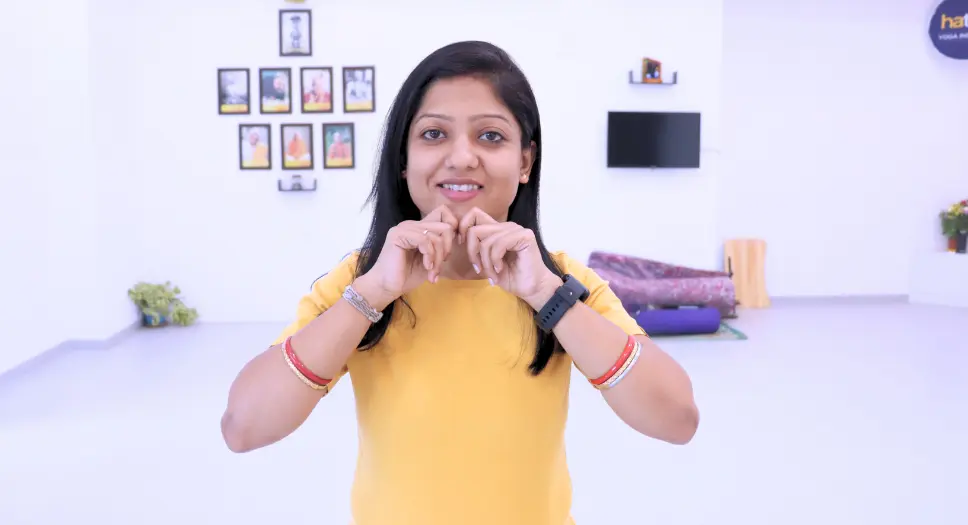
Â

Eyebrows & eyes
- Starting point of eyebrow Middle point of eyebrow Ending point of eyebrow. At each point we have to hold it with index finger for 10 seconds. Then rotate clockwise & anticlockwise for 10 seconds.
- In this, we have to stretch from centre towards Temporal region for 3- 6 times.
- Here we have to stretch in lower part of eyes towards temporal region
- Here we place our index finger on eyeball, gently hold it for 10 secs.
- Here, we stretch out eyes side mus-cles with left hand and then make 8 on the side of the eye with right hand. (Same with other side also. Beneficial for Wrinkles and Dark circles)
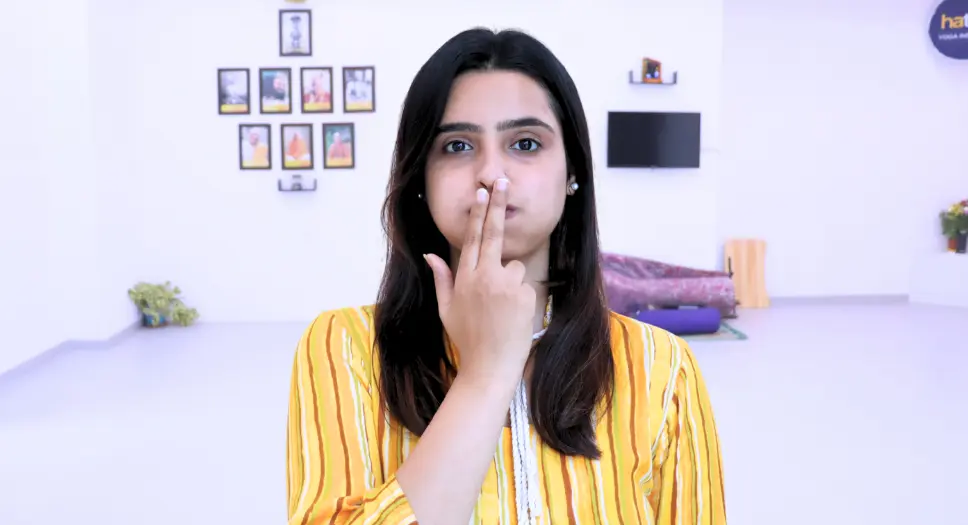
Â
Nose
There are 3 points –
- Upper nose/ Starting of nose
- Middle nose/ Bridge of nose
- End of nose
Â
Ear
- Here we place our index finger on the Cartilage of ear and hold it for 10 seconds. Then rotate clockwise & anticlockwise for 10 seconds.
- Here we place our index finger below & behind the ears, place index and hold for 10 seconds. Then rotate clockwise & anticlockwise for 10 seconds.
- Place two finger on front of ear. Stretch it from front to back for 10 seconds.
- Hold the lower soft part of ear, pull it down. Then hold it a bit upper side, stretch it. Then middle part hold & stretch. Then upper part hold & stretch & lift it up. Do it for 10 times.
Now, before doing Cheek massage we have to place hand on cheeks. Then rotate it clockwise & anticlockwise
Â
Cheeks
- Place the knuckle with index finger, stretch it from end of nose towards Temporal region. At temporal region, lift your finger upward.
- Hold with 4 fingers, stretch from nose towards temporal region for 10 times.
- With the help of 2 palms, stretch cheek from nose to ear, do it for 10 times on right side and the left side also.
- Place index finger, hold 10 seconds. Then rotate clockwise & anticlock-wise for 10 secs. 3 points each.
Â
Lips
- Hold at the centre of the nose and lips for 10 seconds. Then rotate clock-wise & anticlockwise for 10 seconds.
- Here we rotate our index finger from left to right for 10 seconds around lips.
- Here we hold at lower part of lip with index finger for 10 seconds. Then rotate clockwise & anticlockwise.
Â
Jawline
- Place Thumb on lower part of Jaw-line. Stretch it in upward direction from jawline to ear for 10 seconds.
- Place thumb on lower part of jawline, hold there for 10 seconds. Then rotate in clockwise & anticlockwise direc-tion for 10 secs.
- Hold your jawline with index finger & thumb with right hand. Then with the help of left hand stretch upward direction. Do it for 10 seconds. Same with other side.
- With two fingers, hold front & back side of ear. The stretch towards Collar bones.
Â
Throat
- Place two fingers on middle of throat, Hold for 10 seconds. Then rotate it clockwise & anticlockwise for 10 seconds.
- Then place the index finger on middle of throat then stretch towards the collar bone, make a triangle, do it for 10 seconds.
Â
Backside
- Stretch from backside of neck towards collar bone with 4 fingers.
- Do it for 10 secs
Massage for Acne and Pigmentation
For zygomaticus major & minor
- First, we have to place our right hand four fingers on forehead and left hand four fingers on chin and with mouth we make ‘O’ shape. Hold for 10 counts.
- We have to place our index finger on the centre of nose & lips and thumb on the lower part of jawline and make a Round shape again.
We have to stretch our lips muscles.
Â
For mentalis muscle
- We have to place our both hands on the right side of our chest and then face towards left side, lift our face slightly upward & then make a pout. Same with other side and hold for 10 seconds.
- Place both index fingers above your eyebrow and thumb under your eyes. Then stretch eyebrow up and down. Do it for 10 seconds.
Â
For forehead
- With 4 fingers of both hands, stretch from Centre to Temporal region. Do it for 10 seconds.
Â
For nose
- Place index finger on starting point of nose.
- Stretch towards dimple region of cheeks.
- Do it for 10 counts.
Â
For cheeks
- Place 2 fingers on both cheeks and then blush. Gently tap it upward for 10 seconds.
- Place index finger on the top of nose, then put it up & down from forehead to tip of nose, do it for 10 seconds.
Â
Water poses for Acne and Pigmentation
Take a little water & fill your mouth with water.
- Lift your cheeks up and hold for 10 secs. Keep the back and head straight. Lift your chin up with a finger.
- Fill your mouth with water & squish it from side to side. From right to left and vice versa. Do this for 10 counts.
Benefit- It helps to tone our facial muscles.
Water pulling up Pose
- Fill your mouth with water and look upward. Hold for 10 secs.
Benefit – It helps to release stress & toxins.
- Fill your mouth with water. Place palm on right cheek and lift your cheek opposite side. Hold for 10 seconds. Same with left side.
Spinning water pose
- Fill your mouth with water then shake your head with opening your hair. Shake it for 10 seconds. Close your eyes and relax.
- Fill mouth with water, move upward & downward with chewing the water inside the mouth. 10 seconds.
Kapoladhauti kriya /Face cleansing kriya
Kapol – Mukh, Dhauti – purification
Exercise/Technique of Kapola Sakti Vardhaka Kriya –
- Starting Posture of Kapola Shakti Join the tips of the fingers and thumb of right hand with fingers and thumb of left hand.
- Keeping the eyes opened and pout-ing your lips (in the shape of crow’s beak).
- Suck in the air vigorously through the mouth with a sibilant sound and blow out your cheeks. This is called kaki Mudra.
- Keeping your eyes closed and cheeks inflated, close the nostrils with the thumbs with other fingers of both hands joined. Hold the breath as long as you can.
- Bring your chin forward against the cavity of your throat (sternal notch).
- After a certain while (as per your capacity), let the neck return to the normal posture.
- Open your eyes, and exhale through the nose slowly and effortlessly. Simultane-ously, bring your arms in normal position after describing a circle. You can place your hands in normal position – Gyan mudra in seating posture or along thighs in standing posture.
After this kriya, close your eyes and sit straight. Feel the relaxation, feel the flow of blood to your arteries. This practice is very good for increasing the blood circulation and excellent for immunity as well.
Master the Art of Natural Radiance
Ready to take your skin health to the next level? Join the Face Yoga Certificate Course at the Hatha Yoga Institute and discover the secrets to a youthful, glowing appearance naturally. Led by Aanchal Raj, our comprehensive course offers:
- Proven Techniques: Master targeted exercises to lift, tone, and rejuvenate your face.
- Holistic Wellness: Integrate ancient mudras and breathing exercises for overall well-being.
- Professional Certification: Receive a recognized certificate upon completion, with both soft and hard copies available.
- Lifetime Membership Benefits: Enjoy exclusive discounts on future courses, weekly sessions for life, and ongoing faculty support.
Don’t miss this opportunity to turn back time naturally and boost your confidence!